
Release 1.17.0
 Alex Farrugia
Improvement (Document Templates):
Billing Templates have now evolved into Document Templates. This change in name brings with it an additional layer of flexibility, firstly, it is now possible for super users to create and customize new templates for any supported hidma documents. Although it is possible to create an infinite amount of templates for the same document, only one template can be set as the default template for that document. It is however possible to also define and customise different templates for different organisations. Each organisation can only be assigned one template per document type though, so if your Organisation ABC Corporate Services Plc already has a Bill template assigned to it, then if you create a new Bill template and assign it to ABC Corporate Services Plc, this new template will override the previously defined Bill Template for this organisation.
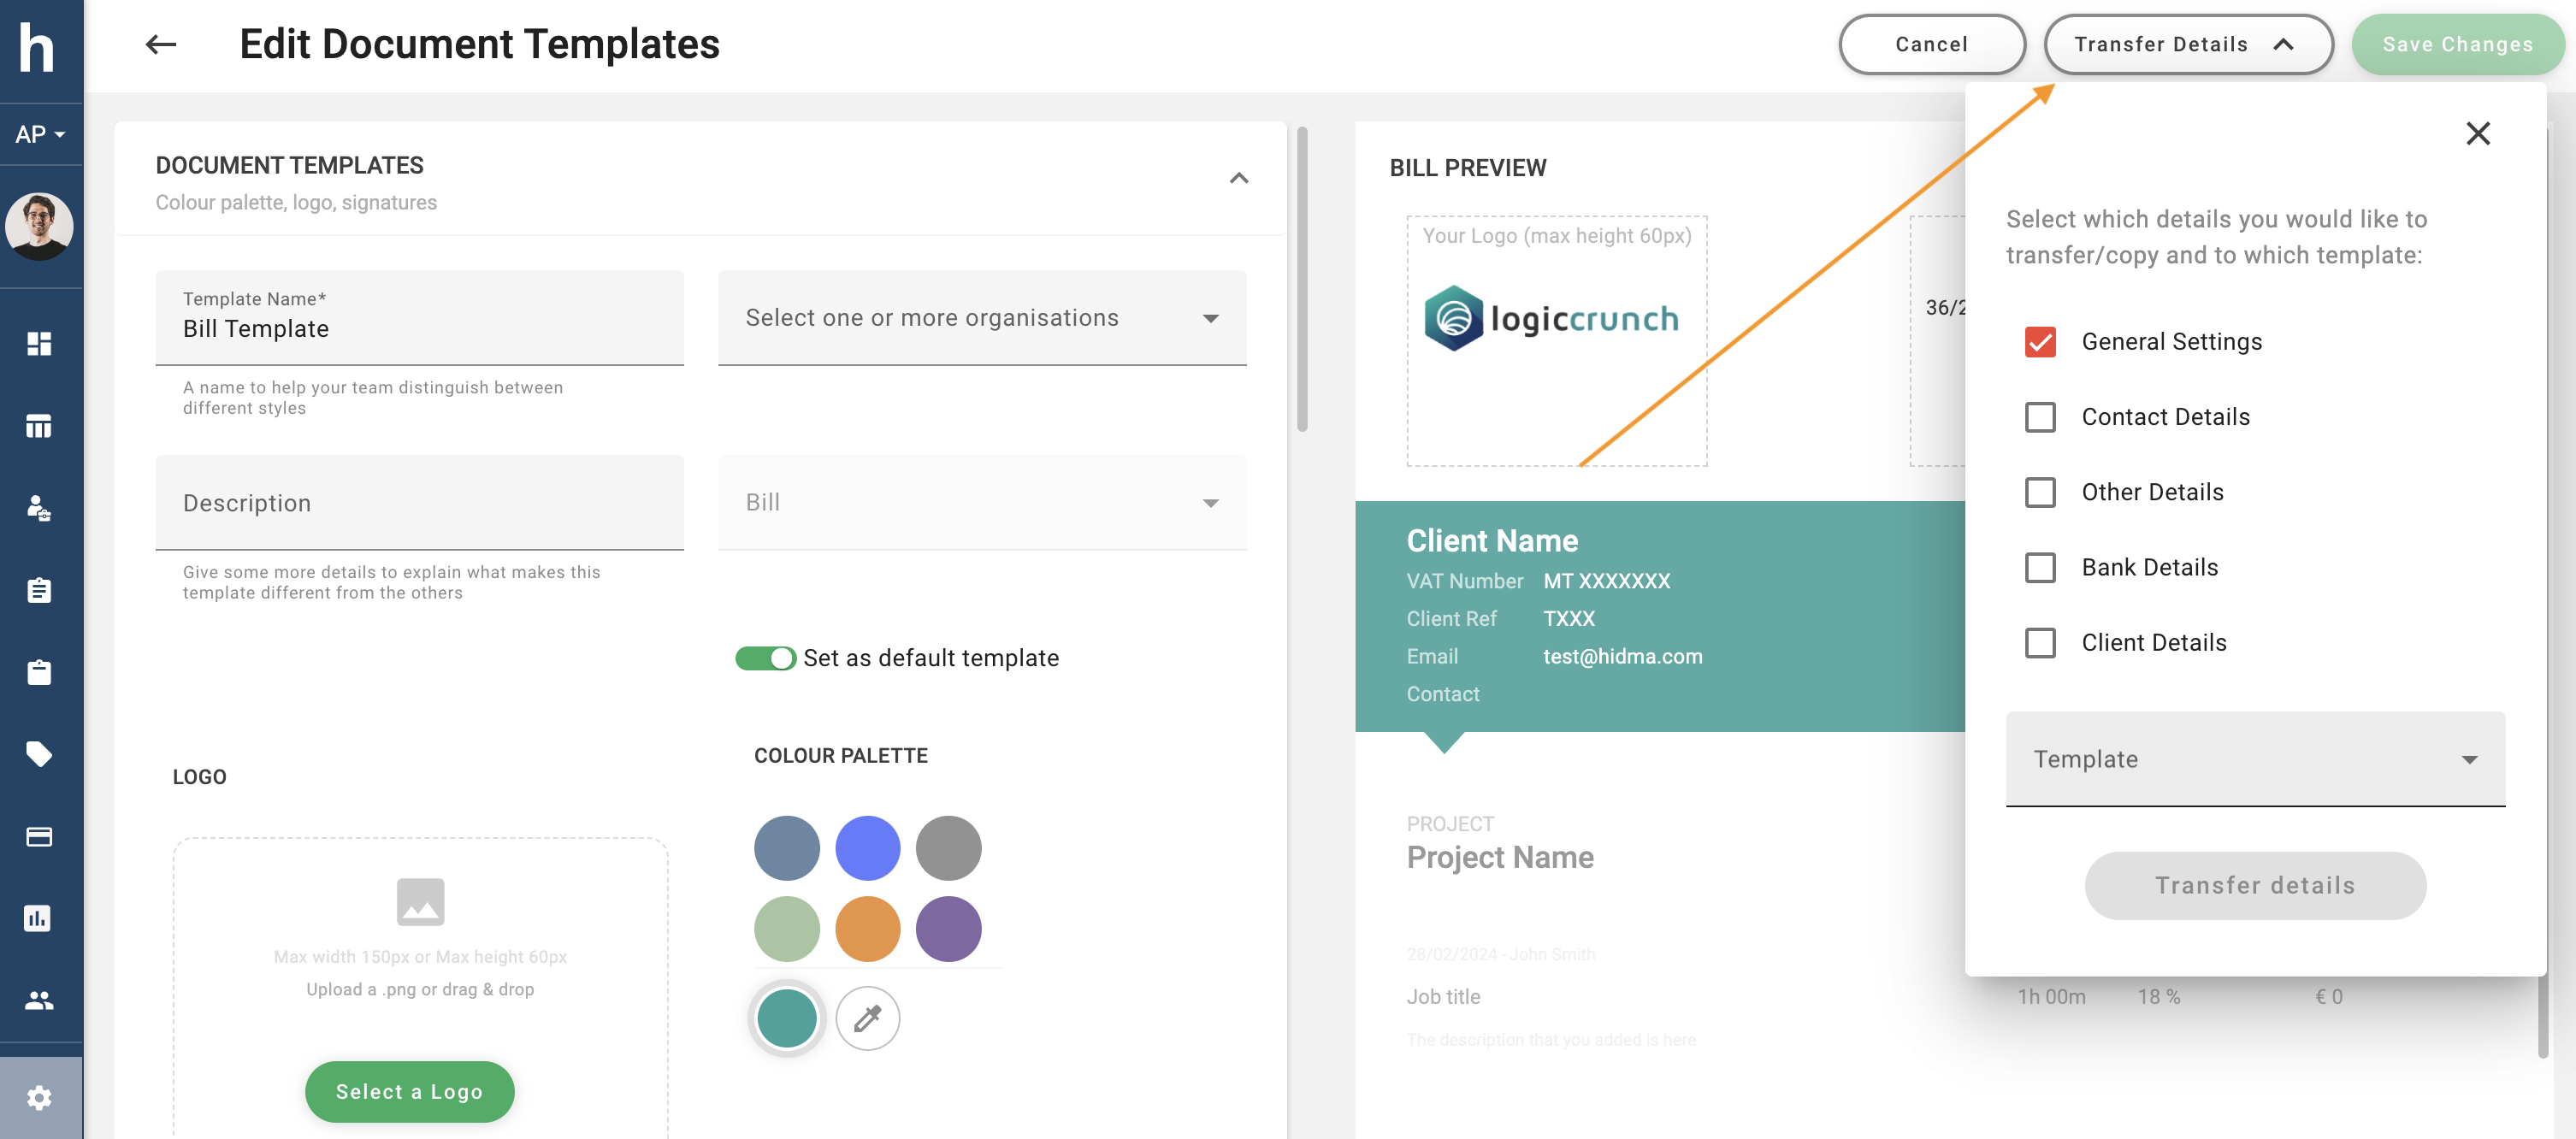
This new feature enables a similar configuration of other document templates such as Receipts and Client Statements which are being rolled out in this release. It also enhances the existing Bill Template with a few additional customisations which can be added, namely:
i) Invoice Date Range (applicable period) - this is calculated automatically based on the work added to a blll
ii) Company Name - in case you want to add your own company name
iii) Company Number - in case you want to add your company registration number
iv) Swift Code can be added to your bank details
v) Mobile Payment details can also be added to your payment details
vi) Document Title, this can be 'Bill', 'Invoice' or whatever title you would like to add to your bills
vii) Two distinct and separate footer messages. These can be used to add notes relating to applicable tax rates or credit terms or simply to thank your customer
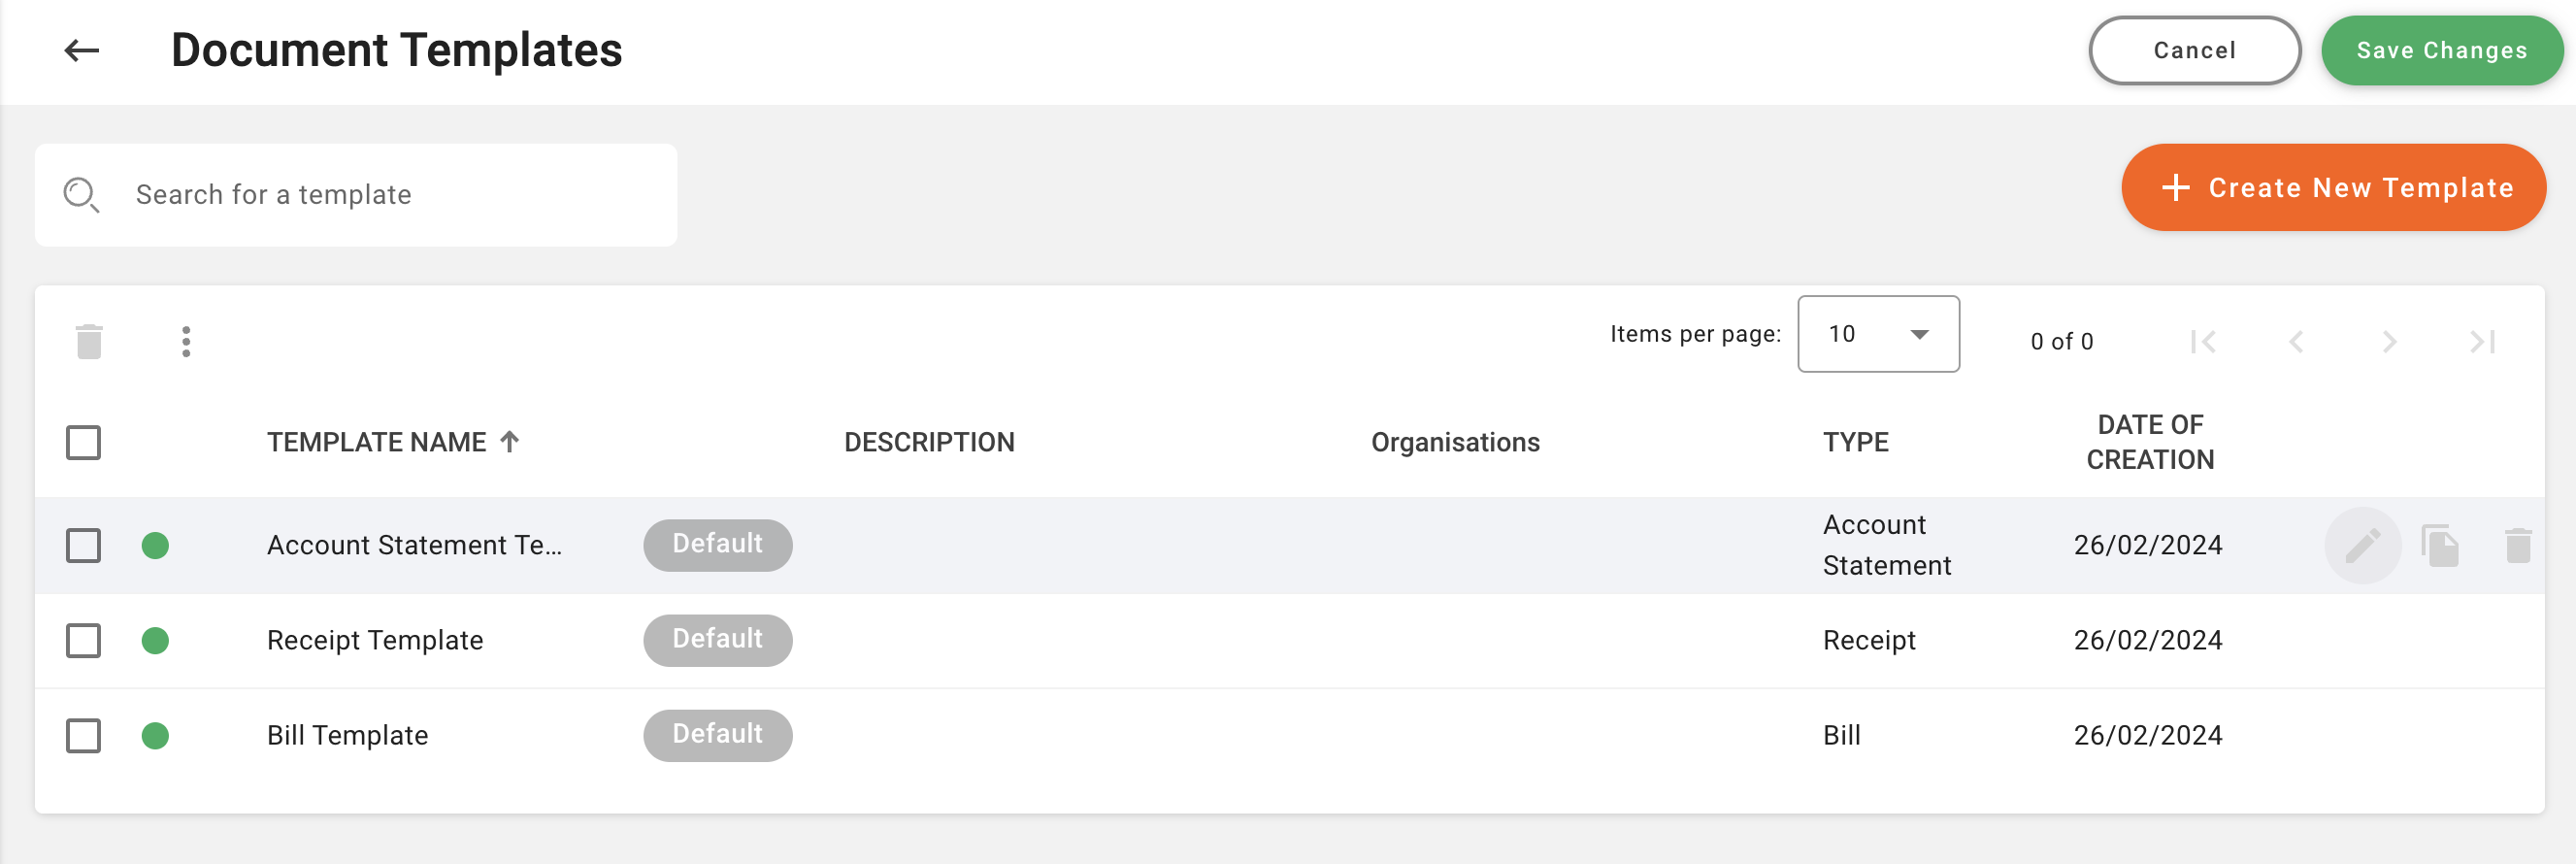
The Document Templates summary page allows you to easily create a new template, duplicate an existing template or even copy parts of a template to another template
Improvement (Billing):
This release also introduces a number of improvements to Bill generation and Bill settings. If you head over to Settings -> Configuration -> Billing Settings, you will notice two new subsections in the Settings page, Request for Payment and Bill Details. The Request for Payment feature enables the creation of Request for Payments instead of Bills, this feature will change most references and labels of Bills and it will also enable some of the settings which fall under the Bill Details section.
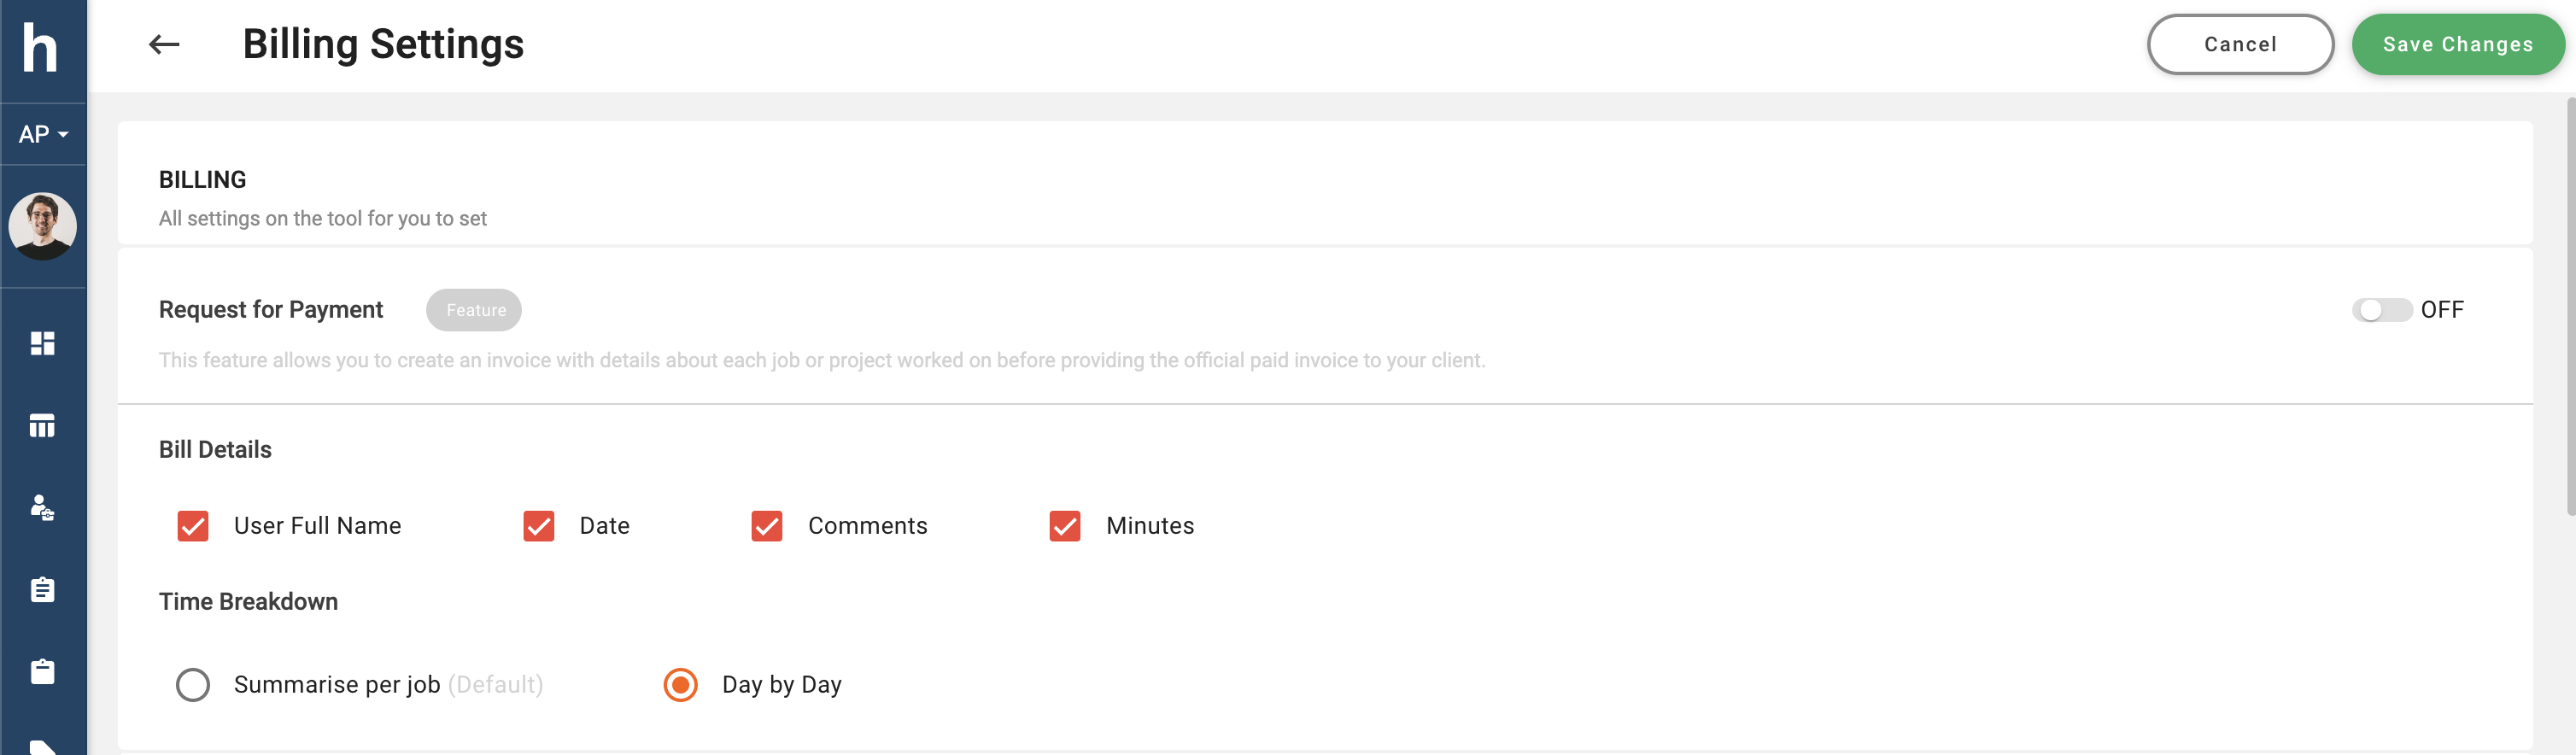
The time breakdown setting refers to whether items which are added to a bill in the billing page are aggregated based on job type or whether they should be split into a day by day account of all relevant timesheet hours. This setting is ideal for providing a highly itemised bill which lists a detailed account all of work being billed. This selection can be further supplemented by selecting any of the available options in the Bill Details subsection. When enabling User full Name and Date, these details will be added to every bill row which is added to the bill. The same applies for minutes. If the Comments option is selected, any comments input by the user in his or her timesheet will automatically be added to the respective bill row being created.
The Billing Settings page now also contains a new sub-section called Document Numbering. This section allows you to define a numbering strategy for each document type. This kind of configuration will be available per organisation. The default setting for each document numbering scheme is based on a prefix made up of the Client Code or Name of the client in question, followed by the last two numbers of the year and sequential number attached to it. However you can also easily define a custom setup where you get to choose the Prefix, Suffix (if needed) and number of additional 0s to add to your sequence.
New Feature (Payments):
The new Payments feature perfectly compliments the existing Billing functionality as it allows Hidma to build a complete picture of a client's activity.
To get started with Payments, you will first have to enable them by navigating to Settings -> Configuration- > Payments Settings and switching this feature on. This will now display the Payments item in the Navigation menu.
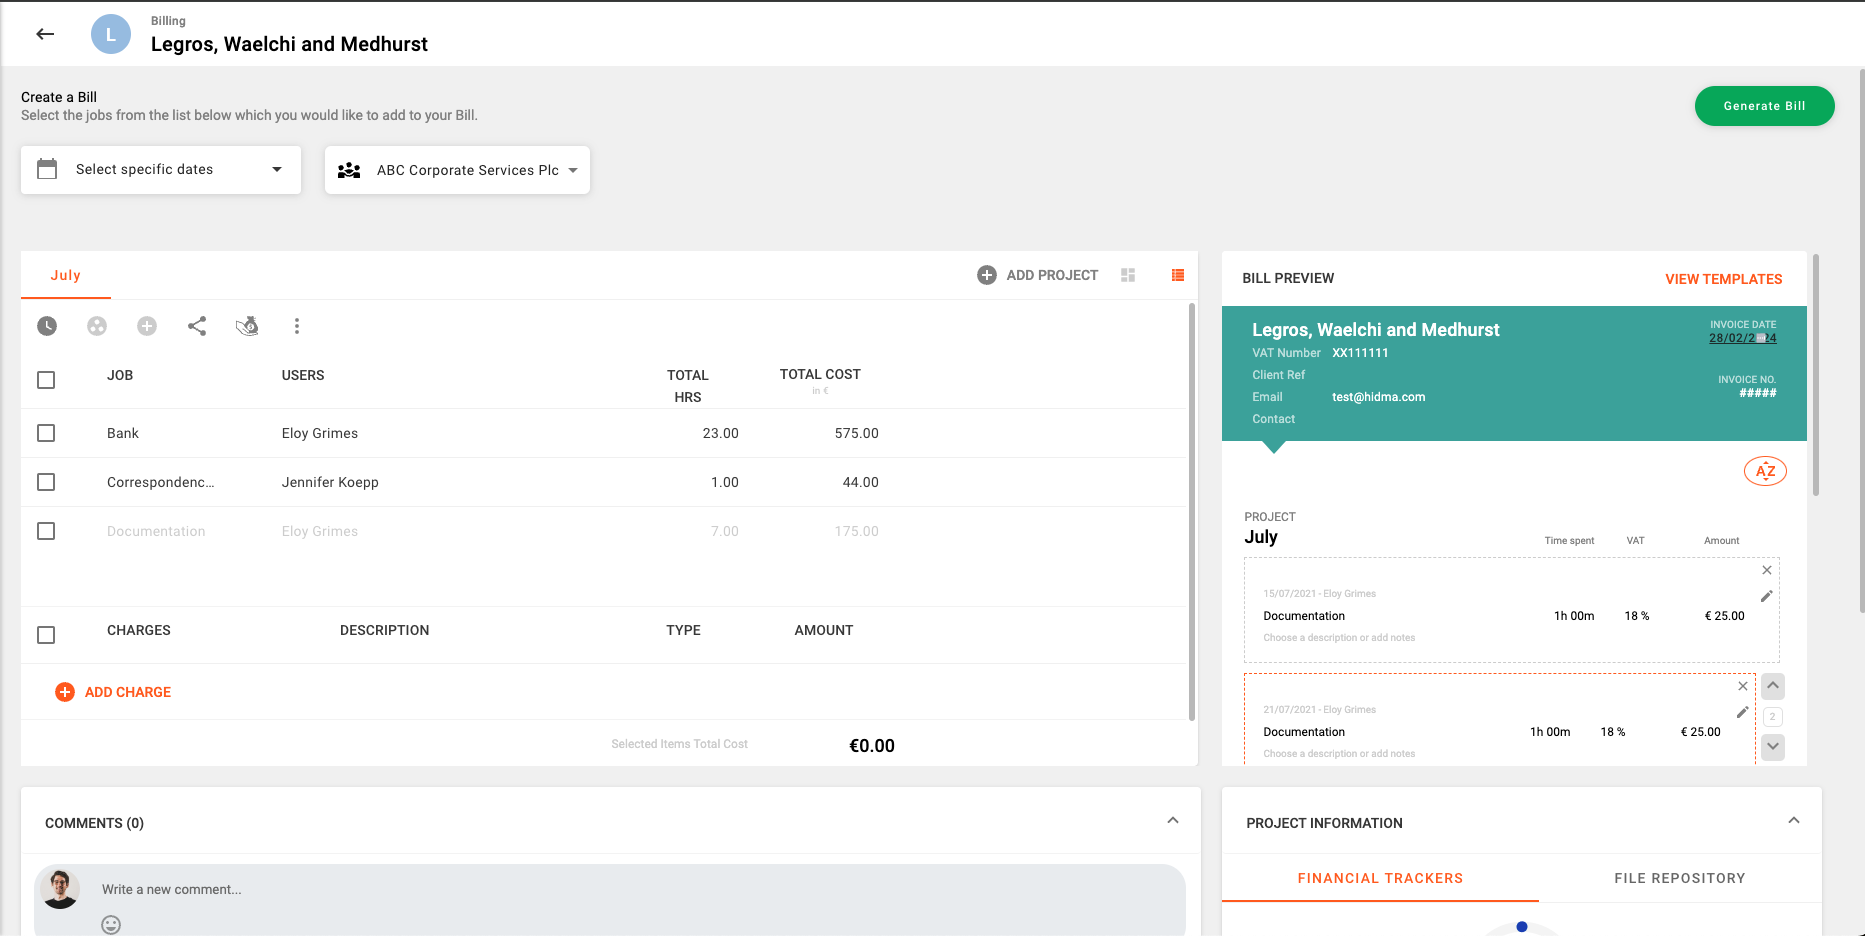
Once you land on the Payments Page, you will have two options for creating new Payment: Add Payment or Quick Payment. The quick payment is the fastest way for registering a payment which covers one bill in its entirety. This will create a new row in the table which you can edit and use to log a new payment in a very easy and efficient way.
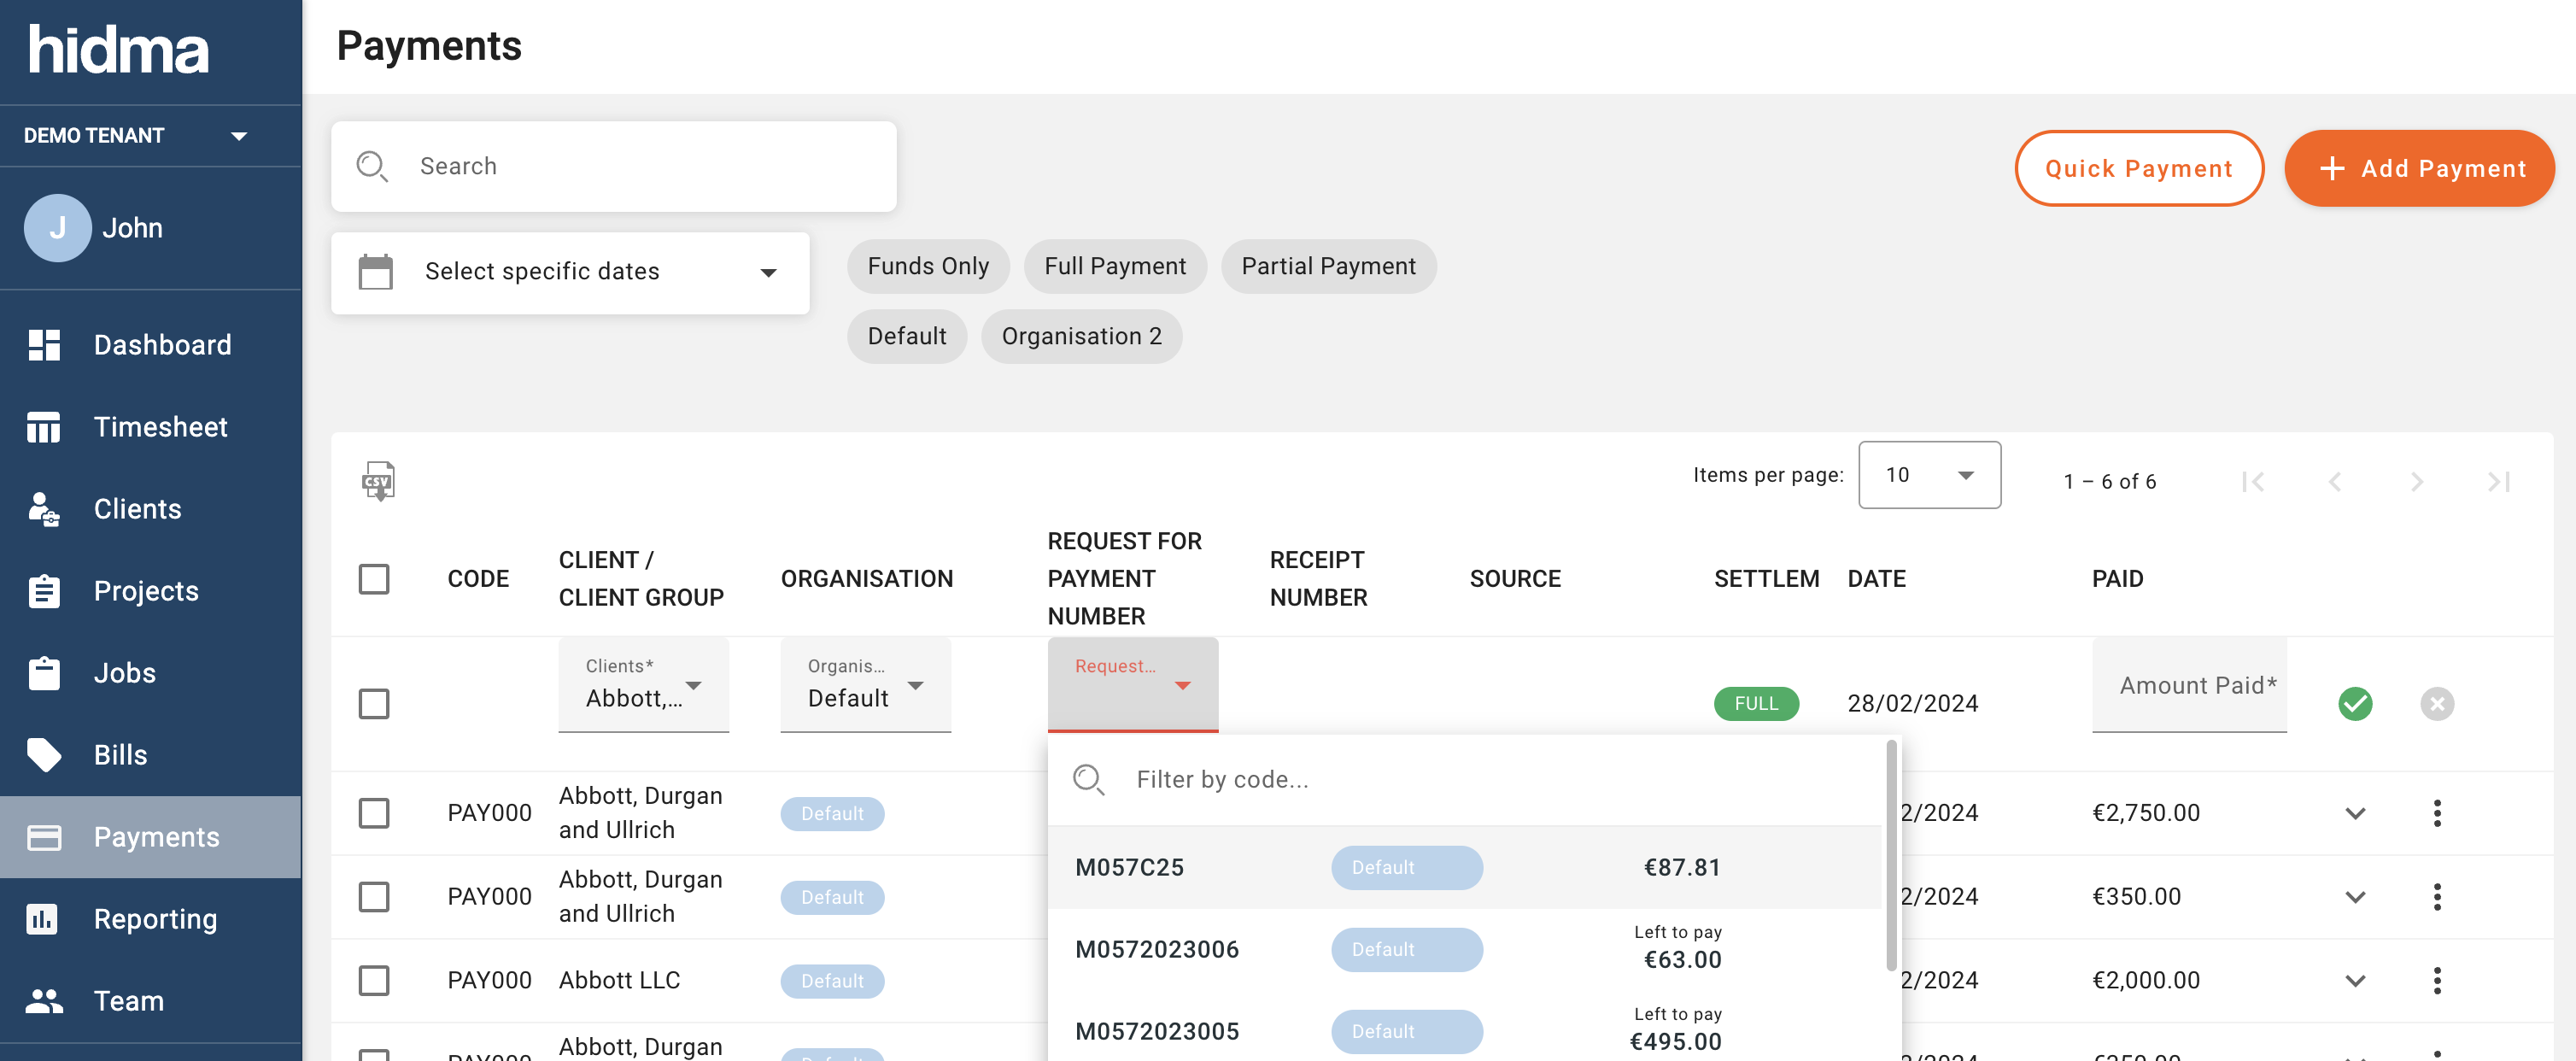
The Add Payment function on the other hand will give you a number of other options, firstly, one needs to choose between a "Funds" payment or an actual "Allocation". In Hidma, Funds refer to a balance on a client's account. So if we choose to add funds, we will be adding a balance to a client's account. Allocations refer to payments or funds which are allocated against bills.
When adding Funds, we are given the option of choosing a client or a client group to assign these funds to. Funds which are assigned to a client group will be available for use by any of the clients within that client group.
In the event that you have multiple organisations configured in Hidma, you are also given the option of adding funds to more than one organisation each time you choose to add funds.
When allocating a payment, you will first need to define the source of this payment - is the money coming from a new payment, the client's existing balance(s) or a combination of both? If you choose a single payment source, then you will be allowed to allocate a payment to multiple bills at one go. If on the other hand you choose to combine payment sources, then you will only be allowed to allocate a payment to one bill at a time.

Once you have filled in the payment amount(s), you will then be asked choose between a Full Payments or a Partial Payment. If you choose the Full Payment type, then you will be allowed to allocate your payment to multiple bills at the same time. The Partial Payment option will however restrict you to only one bill per payment. When allocating a partial payment, you will be able to select different items within the selected bill against which to allocate your payment.
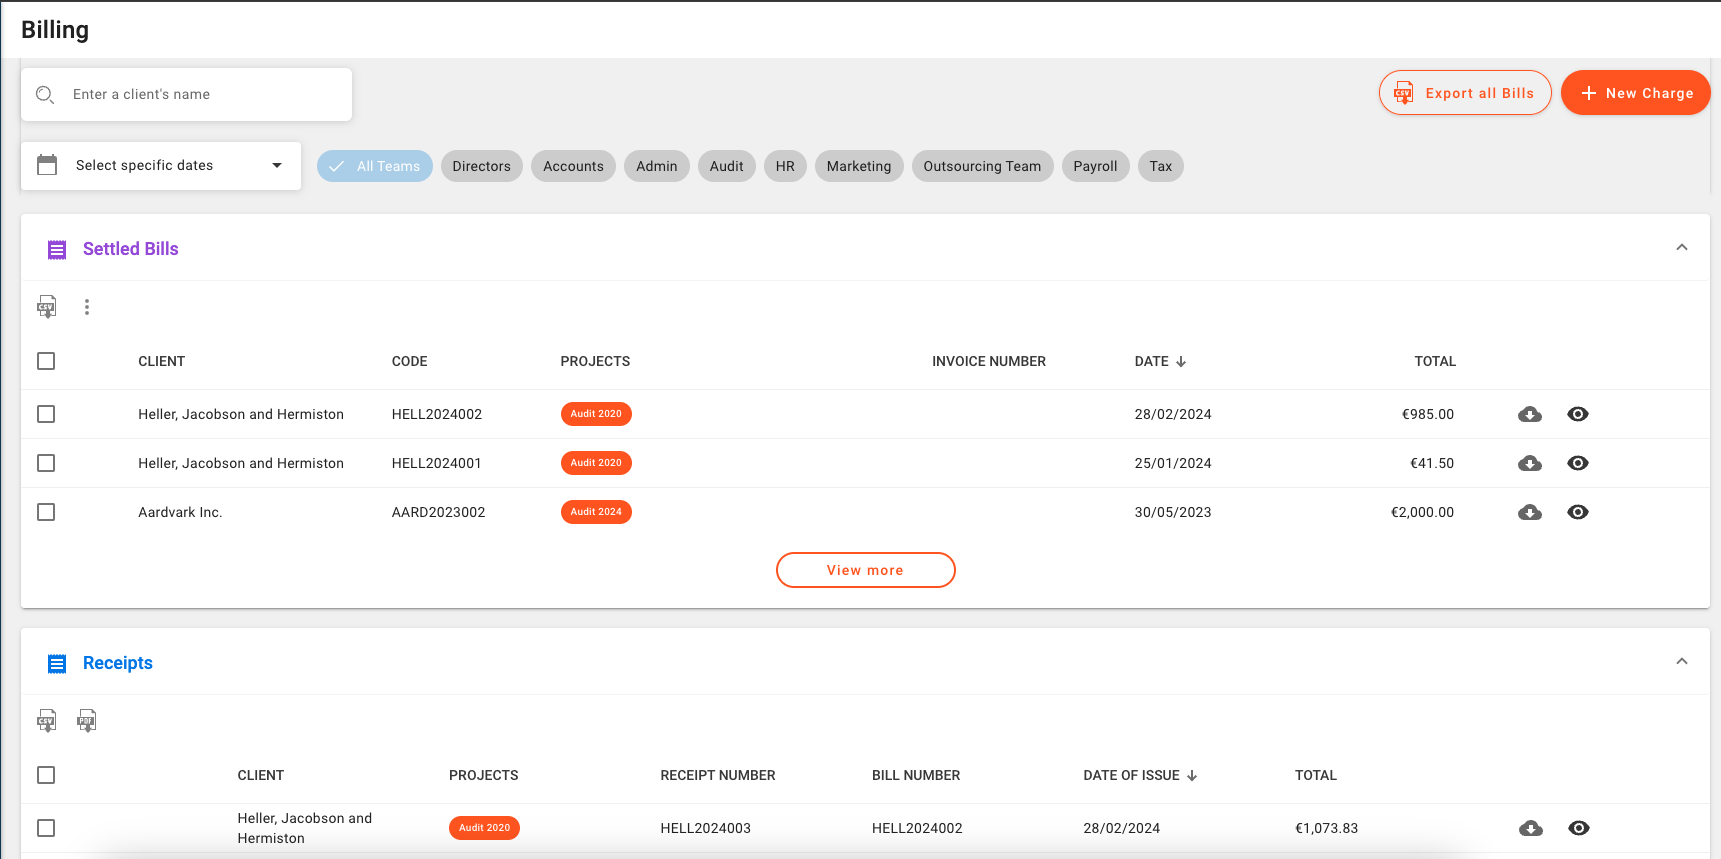
Each bill allocation will generate a receipt for you however this option can be disabled in the last step of the Payment creation process. You will be able to view these receipts either by viewing the Bill in question or else going to the Bills page and scrolling to the bottom of the page.
Any utilised funds in the new payment will be added to the client's balance.
Hidma will allow you to delete allocations, funds and payments, however you will not be allowed to delete funds which have been utilised in other payments.
Bills which have been paid will automatically have their status changed to Partially Settled or Settled and they will become locked.
New Feature (Client History):
If you have enabled Payments, you will also be able to see a new widget on every Client Dashboard. This widget will display the available client balances and will allow you to easily allocate funds. If you wish to issue a Client Account Statement which would display the entire's customer history and balances, you will be able to do so by clicking on the context menu and selecting Issue a Statement.
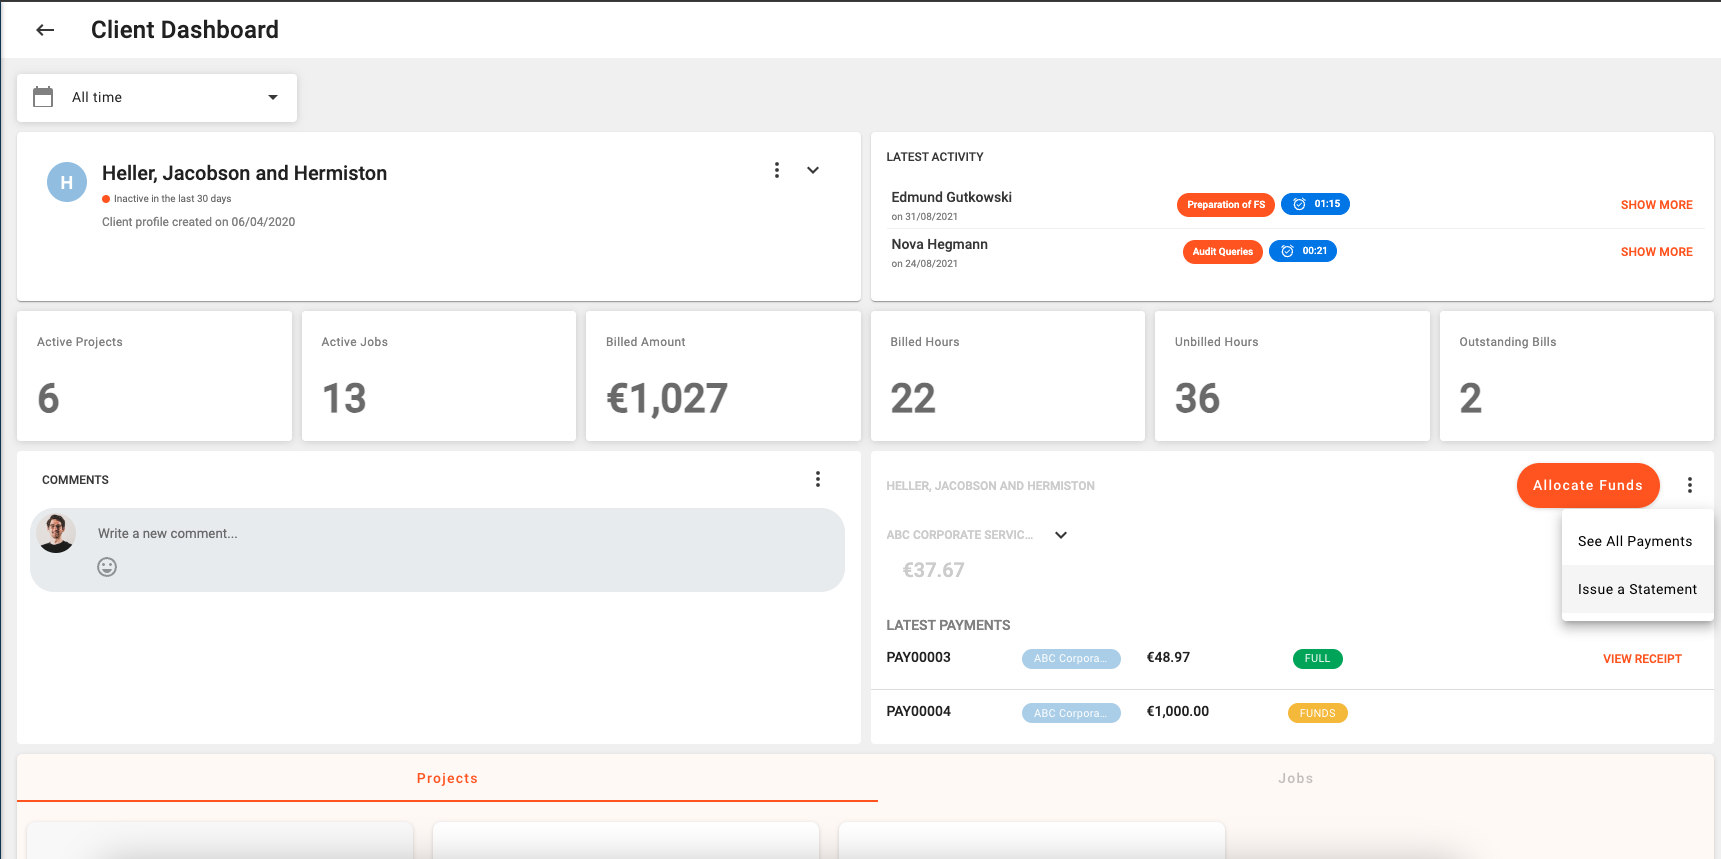
You can choose to restrict the Account Statement by a specific organisation (if you have more than organisation) as well as a specific date range. If you don't specify any of these values then the report will be generated for all time and all organisations.
 Powered by ChangeCrab